default page
SmugMug Upload/Edit Instructions
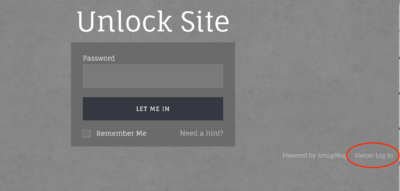
When you are ready to upload photos/videos go to the private PHCP SmugMug site and login with the username and password provided to you. You will need to select Owners Log In, circled in the screenshot below. The center login is for viewing only.
Select Site at the top when you first enter the site and anytime you need to return to
the main site.

Find Your Folder
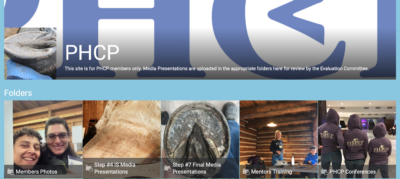
On the Home page you will choose the folder in the correct category for your Media Presentation. Step #4 IS Media Presentation or Step #7 Final Presentation.
In this presentation folder, a folder containing one or more galleries has been created for you. The IS Media Presentation folder will contain one gallery for your Maintenance Trim and the Final Presentation folder will have two galleries. One for the Maintenance trim and one for your Pathology case study.
Add a description
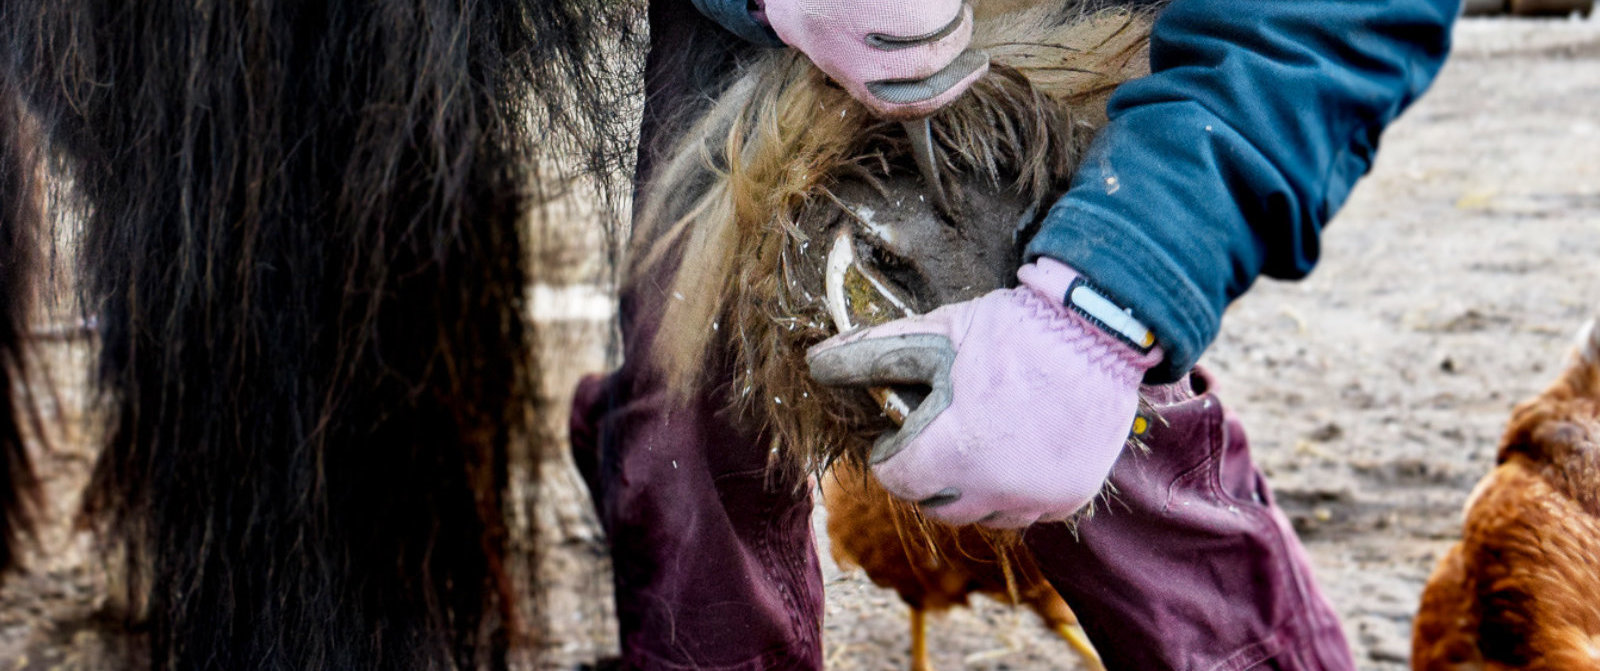
Once you have selected the appropriate gallery in your folder you may add a description of the horse by selecting Settings. This description should be as extensive as needed. Include age, breed, diet, lifestyle, and any and all issues you take into consideration while you work on this horse. By adding the description to the gallery setting, it will show up on every page of your photos for easy reference. This is a great help to the evaluators who will refer back to your subject’s history often.
We recommend that you write the description in another document first, then copy and paste it into the gallery settings description area shown below.
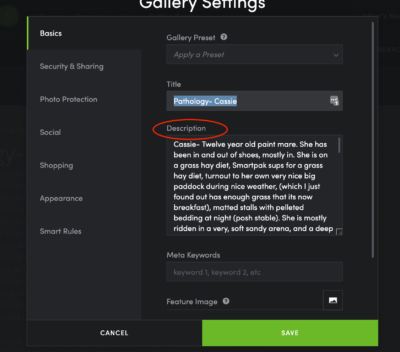
Be sure to hit SAVE when you are finished.
Uploading photos
If you are uploading for the first time into an empty Gallery you may select either of these options while you are in your Gallery.
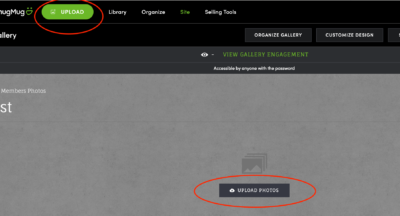
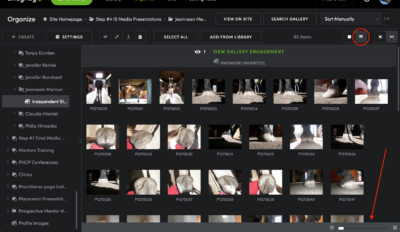
If you are uploading into a gallery with photos already in it, select the big green upload icon in the top bar.
Videos of 20 minutes maximum may be uploaded the same way. They can take a while to show up, so drag them in and go ride your horse. 🙂
Editing
You may edit photos right in SmugMug. Choose the little wrench tool below the photo and – Open in Editor in the drop down.
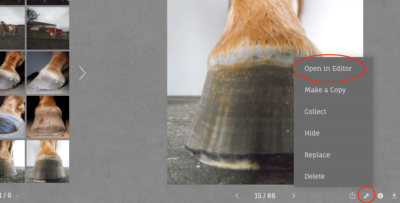
In the Editors screen you may crop, rotate, straighten, adjust color, and add titles and captions. Cropping your photos will help to zoom in on the hoof. Cropping is a good idea if there is a lot of excess space around the hoof but cropping too close can cause the viewer to lose perspective. Rotating takes time so you may not see it immediately. Check back later.
You can scroll back and forth through photos without leaving the Edit screen by using the arrows right and left. The arrow on the upper right will allow you to change between editing options and don’t forget to SAVE.
Only admin can delete photos and galleries. If you need photos deleted please title them delete and contact PHCP to let us know.
Organizing your photos
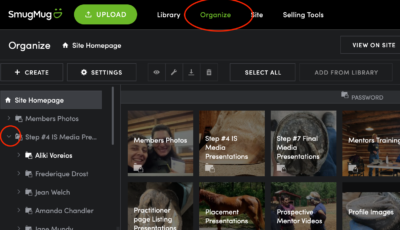
Click on the Organize icon at the top of the page to access this area. The left side of this screen is where you will find your gallery to organize the photos into the correct order. Use the down arrow next to your name to find the gallery you want to work in.
Sorting your photos to have before and after views side by side makes it much easier for the Evaluation Committee to view your work. There are several ways to organize your photos.
Sort by the file name
This must be done before you upload the photos. You can not change the file name once they are uploaded to SmugMug. The way you number your files before you add them to SmugMug is important to make sure things sort correctly. Computers sort by looking at the first character/digit, then the second, then the third, etc. They don’t see a three-digit number as a whole.
Example: IMG_100.jpg would appear before IMG_23.jpg. The computer sees that 1 comes before 2 and then stops (rather than seeing that 23 comes before 100).
Sort by caption
Once your photos are uploaded you can add a number to the caption box under each photo in the order you would like them to sort, 10, 11, 12, 13, 20, 21, 22, etc.. The caption box is below the title and this is where you put comments for each photo. You must click the check mark to save your caption. Leave the number in the caption box when you go to add your comments or it will re-sort if ‘sort by caption’ is still selected in the organize view.
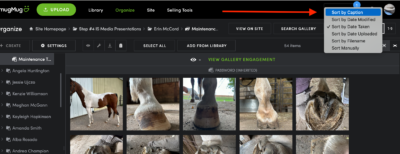
In the upper right of the organize screen you will find a ‘sort by’ drop down. Change this to caption or file name to sort the photos. If you are sorting by caption, once you have selected this and return to the site they will sort as you add the caption. It just takes a moment.
Here is a suggestion for numbering the caption of each photo. Use this chart as you go through the photos. The first number can represent LF, LH, RH, RF, 1, 2, 3, 4. The second number can represent the view and BT or AT.
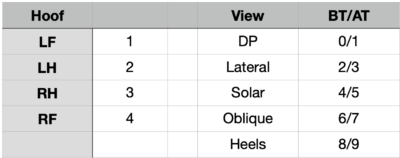
The Oblique view, after trim of the right hind would be numbered 37. For body shots you could use 01 for before and 02 for after.
Sort manually
You can select sort manually from the drop down to drag photos into the correct order. This has proved to be challenging for some. It helps to drag and drop very slowly. Select a photo and hold it a moment until you see the tree box, then move it until the green square is where you want and let go. If you are moving a photo a distance try moving it up one or two levels at a time.
 .
.
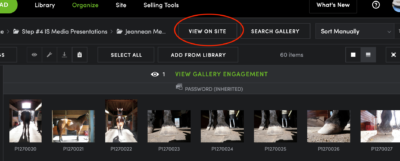
To exit the Organizing window back into the gallery you are working on select VIEW ON SITE.
Adding Titles and Captions
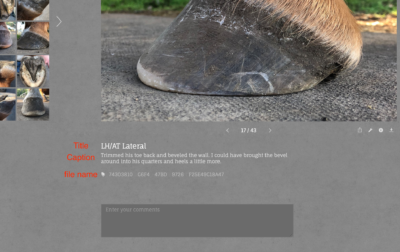
The title tells us which hoof it is, before or after the trim. (ex: LR/AT) If you changed the file names on your photos you can click on the tab to confirm which foot it is.
Captions are a place to add your comments to the photo.
There is a comments box also but it is better to put your comments in the captions box. They are easier for the committee to see while viewing the photo, as the comments end up down at the bottom of the page.
You must click on the check mark next to the title or caption box in order to save it and any changes you make.
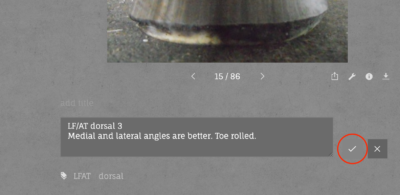
Share your thoughts about the hoof in the photo. What do you see? Why did or didn’t you trim something? Help the evaluators to understand your decision making and thought process.
If you would like some help with any part of this please contact us.
Your media presentation will not be viewed by evaluators until you notify us that it is ready. You can start uploading right away and take your time getting it just the way you want.