default page
Final Media Presentation Guidelines
The Final Media Presentation will be presented in two parts. A maintenance trim and a hoof pathology case study. For more detail on taking the correct views and producing quality hoof photos, please check out Good Hoof Photos and How to Take Them.
Part 1: Maintenance Trim
This may be presented as a photo or video presentation. If you choose a video presentation please also provide still photos for an up close view of your work.
PHOTO GUIDELINES
Complete before and after hoof photos of a maintenance trim on one horse. This is a horse you have been trimming long enough to correct most issues, such as thrush and flares. It is a relatively balanced hoof with no major pathologies. You trim this horse on a regular appropriate schedule and keep any minor imbalances in check without having to remove a lot of material.
- Photos must be clear and sharp, using natural lighting.
- The dorsal and lateral views must be taken at ground level and all photos should be taken up close, at the correct angle.
- Hoof photos will include the views shown below, of all 4 feet, before and after the trim.
- Include a full body shot, taken from the side of the horse, before and after the trim.
- Label each photo as before trim = BT or after trim = AT, with the hoof location. right front = RF, left front = LF, right hind = RH, left hind = LH. example: before trim on the right front is BT/RF
- Photo should be organized with the before trim photo followed by the after trim photo of each view, on each hoof. If collage photos are used there should be no more than 2 photos (the before and after) in each collage.
- Comments must accompany the photos and are an important part of the presentation. Tell us about this horse. Include it’s breed, age, history, diet, lifestyle, and anything else you may have considered when planning your trim. These details and comments on individual photos may be posted in your smugmug gallery.
VIDEO GUIDELINES
- Assess the horse before you begin. Give us an oral history and discussion of diet, lifestyle and any information you may use to decide on your trim that day. These comments may be added to the gallery as well.
- You may want to walk or trot the horse out and discuss what you are seeing in its movement.
- Trim two or more hooves while you describe what you are doing and why.
- It may be helpful to talk to the cameraman as if they are a student or an owner.
- Be sure to zoom in enough for some close-ups of the hoof before and after the trim.
- Show us the same views on the video, before and after the trim, as required in the photo media guidelines.
- Still photos may be inserted into the video or added to your album, to give the evaluator a clearer picture.
- Video segments must be kept under 20 minutes to be uploaded to SmugMug. Add as many segments as you need.
Part 2: Pathology Case Study
This series of trims should show improvement on a horse with hoof pathology.
PHOTO REQUIREMENTS
- Photos will be taken of one set of hooves only; the two hooves that are most affected by the pathology. This could be both fronts, both rears, or one front and one rear.
- Pathologies may include, laminitis, founder, navicular, flaring, under run heels, quarter and toe cracks, heel contraction, etc.. These do not need to be extreme cases such as sole penetrating founder. It is improvement we are looking for in the pathologies we see every day rather than those extreme cases that may not show much improvement.
- Include the same views of the hoof and body as in the maintenance trim.
- These photos will document a series of three trims taken over time. They do not need to be consecutive trims. There may be a large space of time between your first and your last trim. Your first trim does not need to be the first time you work on the horse.
- First trim – before and after hoof and body photos
- Second trim – after hoof and body photos
- Third trim – after hoof and body photos
- If you have photos that don’t meet the requirements, but show the pathology at an earlier time, you may include these in addition to the three required trims in the series.
DISCUSSION AND COMMENTS
- A detailed description of the horse should be included in your case study. Age, breed, history, diet, lifestyle, environment, and anything else you considered when planning your course of action. Lots of detail is encouraged.
- Test results like Insulin and ACTH, and Radiographs may be included.
- Share your ideas on possible causes/triggers of this hoof pathology.
- Discuss the development of your rehab plan. Please share your thought process with us throughout the presentation. What factors did you have to consider at each trim? Comments can be added to individual photos in your case study and are an important way to show your knowledge.
- Discuss any hoof protection used or not in the course of rehabilitation. What type, how long, and for what purpose? If not, why not?
- If you are using hoof protection be sure to show us the trim photos of the bare hoof. You may add additional photos to show whatever form of protection you may have used.
Please read through the SmugMug Upload and Edit Instructions before you begin uploading your presentation.
TRIM GUIDELINES
Frog
Trimmed for hygienic purposes only where necessary to keep the central sulcus open and clean up flaps and tags which could harbor bacteria. The environment must be considered.
Sole
Remove shedding material only when necessary to balance the hoof and when the sole is not already too thin.
Bars
Tapered smoothly to the sole plane from the heels with no lumps or high area pressure points that would make primary ground contact. Overgrown laid over bar material should be removed or thinned around the frog if caudal health and sole depth allow.
Heels
Balanced to the collateral grooves and the limb as possible. Lowered and brought back to create a clear landing zone. Internal structural development and frog health must be considered when deciding on heel height.
Toes
Brought back to create the proper break over in relation to internal structures. Sole depth and the presence of lamellar wedge must be taken into consideration when determining optimal break over of the hoof on that day.
Roll / Bevel
Should be smooth and with an even height corresponding to the coronet growth above. The roll should be functional so that the horse can break over easily and wear the hoof evenly throughout the trim cycle.
Overall impression
The hoof should give the impression of having been done by a professional with attention given to the quality of work. There should be no rough nipper, rasp or knife marks.
If you did not follow the trim guidelines, clearly explain why. Part of what the evaluation committee is looking for is a good understanding of how you approached the trim on that hoof. If you see something you would have done differently, if you could have a ‘do over’, please express this. Trimmers are only human, and sometimes things appear differently in a photo than when we are in the moment with the hoof in hand. Carefully detail your considerations with regards to diet, lifestyle, booting, etc.
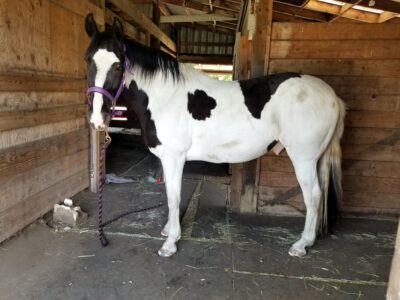
Full Body shot
position the camera perpendicular to the withers/barrel and on the same elevation as the horse
Dorsal view
position the camera on the ground and perpendicular to the center of the hoof
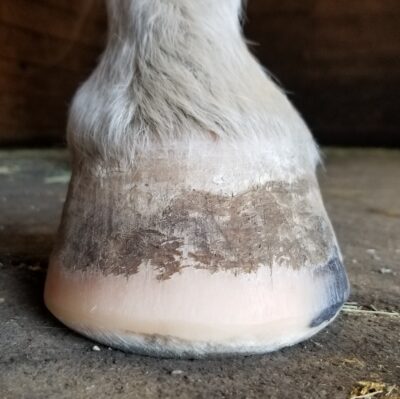
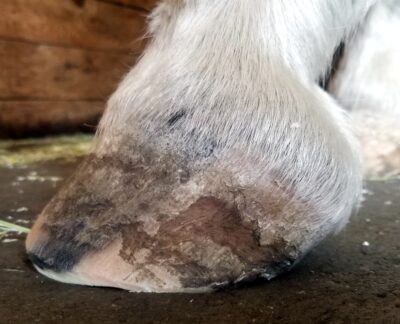
Lateral view
position the camera on the ground line up the heel bulbs to make sure you are truly perpendicular to the hoof
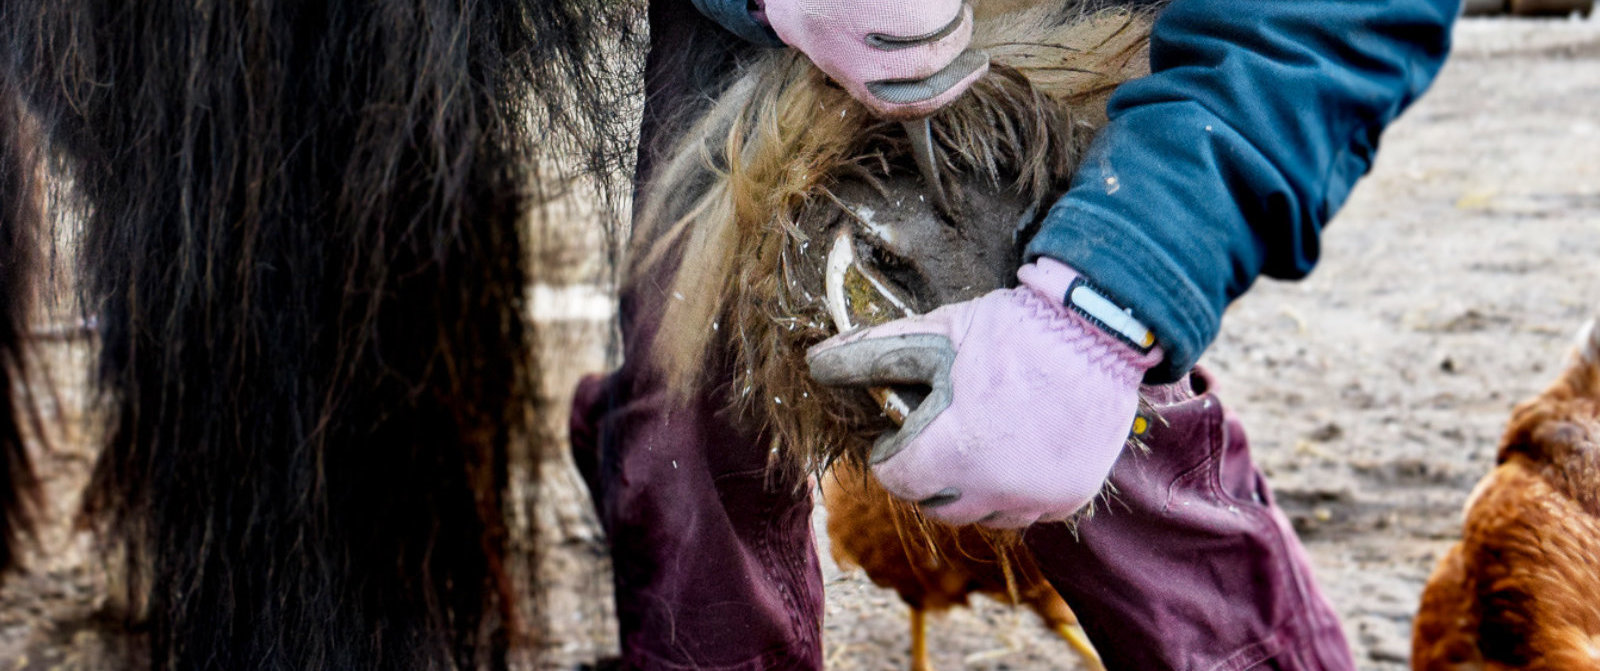
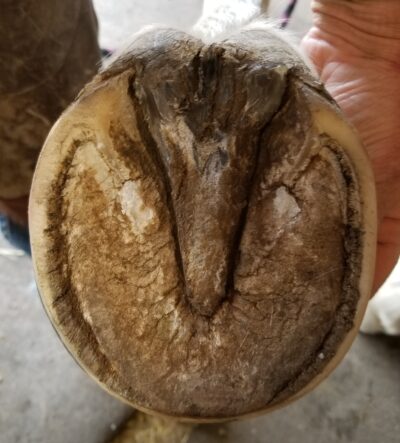
Solar view
point your camera perpendicular to and directly above the sole
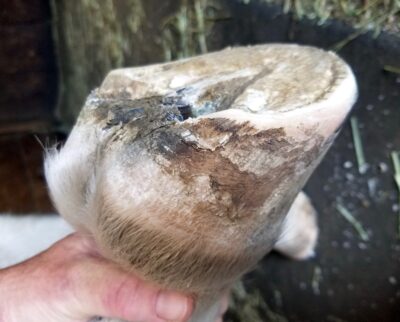
Oblique view
this view is shot from the lateral heel across the medial toe, it should be at a high enough angle to see the whole sole, but low enough to see the depth of concavity
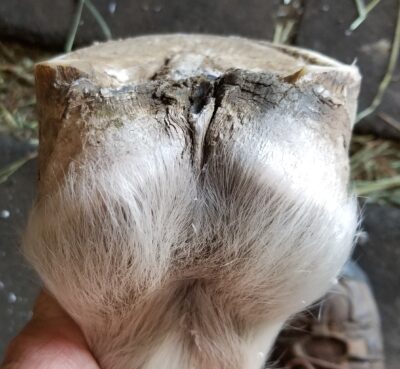
Caudal view
take this view just like you are checking the balance and looking for any high spots